
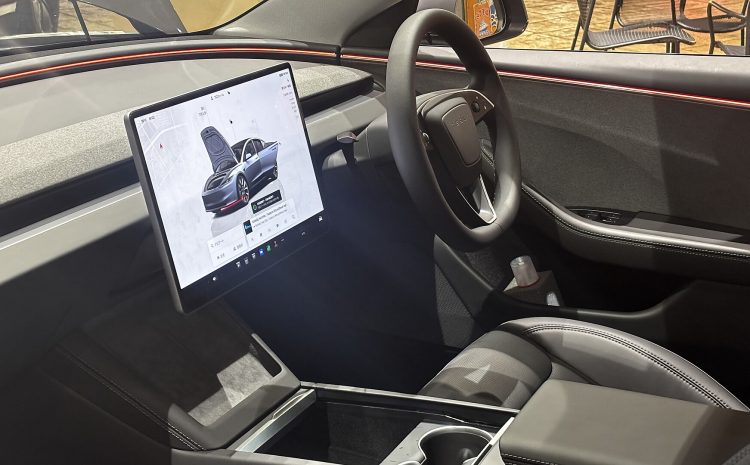
Tesla Cabin Air Filter Replacement & AC Not Cold Guide 2026
2026 Tesla Cabin Air Filter Replacement & AC Not Cold Guide: Musty Vents, Weak Cooling? Five Causes, Self-Checks and Price Reference at a Glance
Hong Kong goes from the dripping damp of April and May straight into 33°C baking heat from June to September, and plenty of Tesla owners know the feeling: “I switch the air-con on and there’s a musty smell, and the airflow is so weak it’s barely running”, or “it’s set to the coldest setting and halfway through the drive the cabin feels stuffy again”. Worse still, some owners hear “the air-con isn’t cold” and immediately assume the compressor has gone — a bill that can run into tens of thousands of dollars — when a proper inspection would have found nothing more than a clogged cabin filter costing a few hundred.
This guide covers it all in one place: when your Tesla cabin filter needs replacing, which warning signs to watch for, how to run a basic check on weak cooling yourself, reference price ranges in Hong Kong, and everything worth knowing before the work is booked. By the end you’ll know whether your car needs “a filter and nothing more” or a proper workshop diagnosis — and how to avoid being told the whole system has to be replaced before anyone has even looked at it.
💡 A quick heads-up: an air-con that isn’t cold does not mean the compressor has failed. Tesla’s climate system is made up of the compressor, condenser, refrigerant, blend door actuators, temperature sensors and software settings, and a fault in any one of them will leave you feeling “not cold”. The reliable approach is to run the basic checks first, then have a technician read the fault codes on diagnostic equipment and test with pressure gauges, so the cause is confirmed before anything is swapped. The rule we work to: inspect first, quote second, start work only once you approve — never agree to a full system replacement before anyone has looked at the car.
Contents
- What is a cabin air filter, and why does it matter more in Hong Kong?
- When should it be changed? Official intervals plus 4 warning signs
- Which filter should you choose? Standard activated carbon vs HEPA
- Air-con not cold: the 5 main causes (with comparison table)
- 5 self-check steps, and when to book it in immediately
- How a professional inspection works: check → quote → go-ahead
- Price reference: filters, refrigerant and compressors at a glance
- 6 maintenance tips to keep the cold air flowing
- Frequently asked questions (Q1–Q10)
What is a cabin air filter, and why does it matter more in Hong Kong?
The cabin air filter is the filtration layer fitted at the air-conditioning intake. It traps pollen, industrial fallout, road dust and airborne particles before the air reaches the cabin. Tesla’s owner’s manual describes its job as preventing pollen, industrial fallout, road dust and other particles from entering the cabin through the vents. That sounds basic enough, but it has a direct effect on two things: airflow volume and cabin air quality.
Three things in Hong Kong that wear a filter out faster
- Extremely high humidity: Hong Kong averages over 80% humidity across the year, and a filter that stays permanently damp becomes a breeding ground for mould and bacteria – the most obvious result being that musty, sour smell the moment the air-con comes on;
- Road dust and traffic fumes: stop-start city driving, constant tunnels and heavy bus and motorcycle exhaust mean the carbon layer becomes saturated and filtration performance falls away sharply;
- Street parking with no cover: cars left out in the open collect dust, leaves and pollen around the intake, which clogs the filter faster.
Where is the filter, and why does it cost labour time?
It depends on the model and year — on the Model 3 and Model Y it’s usually behind the glovebox or behind the trim panel at the side of the centre console, while on the Model S and Model X it’s generally behind the glovebox. Changing it means removing interior trim panels, pulling out both filter elements, and making sure the sealing edge is airtight when it goes back in. It sounds simple, but first-timers easily snap a clip or fit the filter the wrong way round (there’s an intake face and an outlet face), which is why plenty of owners hand the job to a technician the first time. To see what our inspection and servicing covers, take a look at our Tesla repair service page.
When should it be changed? Official intervals plus 4 warning signs
Tesla’s official maintenance guidance states: replace the cabin air filter every 2 years, or every 3 years for the HEPA plus activated carbon specification. That’s the baseline for “typical driving conditions” though — in Hong Kong’s humid, high-exhaust, street-parked environment, the industry norm is to shorten it to an inspection every 12 to 18 months, replacing straight away if there are clear warning signs.
Warning sign 1: a musty, sour or “dusty” smell from the vents
The most common sign, and the earliest. A musty smell means mould has taken hold in the filter and the evaporator — particularly noticeable after Hong Kong’s damp spells. If the smell is still there after a filter change, an anti-bacterial climate system clean is the next step.
Warning sign 2: noticeably weaker airflow at the same fan setting
Setting 3 used to blast the air out, and now you need setting 5 for the same effect: that’s almost always a filter clogged with dust. It’s the most objective indicator there is, because the blower motor itself is far less likely to fail than the filter is to clog.
Warning sign 3: the cabin mists up, feels stuffy, and you feel drowsy
A clogged filter reduces air exchange, so moisture and carbon dioxide build up — the windscreen mists over quickly and rear-seat passengers feel they can’t breathe properly. Owners with young children or family members with allergies notice this one first.
Warning sign 4: the filter looks black, with leaves or fluff in it
If you’ve pulled the filter out yourself and found it grey-black, with small leaves or even insect remains in it, it’s well past its life. Rather than waiting for a smell, glance at it during the annual service — it’s the simplest test there is.
💡 Worth remembering: put “check the cabin air filter” on your annual maintenance list, alongside brake pad thickness, tyre pressures and brake fluid moisture content. Plenty of owners remember the brake pads and ignore a filter for four or five years, only changing it once it starts to smell — yet the filter is the cheapest consumable in the whole climate system, and replacing it on schedule avoids much bigger bills later.
Which filter should you choose? Standard activated carbon vs HEPA
There are two main types of filter sold for Teslas: the standard activated carbon filter (usually the original equipment type) and HEPA-grade aftermarket filters with an activated carbon layer. The difference isn’t which one is “better” — it’s the trade-off between filtration performance, replacement interval and price. The comparison below should help you decide.
| What’s being compared | Standard activated carbon (common OE type) | HEPA + activated carbon (common aftermarket type) |
|---|---|---|
| Filtration | Traps pollen, dust and larger particles; the carbon layer absorbs odours | Traps finer particles (pollen, PM2.5 range) with noticeably better odour control |
| Official replacement interval | Around 2 years | Around 3 years (HEPA + carbon specification) |
| Hong Kong recommendation | Inspect or replace every 12–18 months | Around every 2 years, depending on conditions |
| Airflow resistance | Lower | Slightly higher — poor-quality HEPA filters restrict airflow, so choose a reputable brand |
| Reference price (parts + labour) | HK$350–900 (depending on model) | HK$500–1,200 (depending on model) |
| Best suited to | Everyday drivers, mostly short city trips | Families with children or allergy sufferers, street parkers, owners who want the best air quality |
The above are 2026 reference ranges for the Hong Kong market, for budgeting only; the actual price depends on the model, the brand of parts and labour time, and is confirmed by the written quote after inspection.
On a related note, if you also have battery questions — whether street parking or running the air-con on preconditioning has any effect on the low-voltage battery, for example — our battery replacement service page covers the warning signs and the right time to change a 12V battery.
Air-con not cold: the 5 main causes (with comparison table)
When the air-con feels weak, the real cause is usually one of the five below. Working out which one it is stops you paying for a compressor when all that was needed was a filter.
Cause 1: a blocked cabin air filter (cheapest and most common)
A filter packed with dust cuts intake volume and the evaporator’s heat exchange drops, so you get weak airflow that never quite gets cold — though it rarely stops cooling altogether. It’s the easiest cause to confirm yourself: pull the filter out and look. The fix is a filter change, a consumable-level expense.
Cause 2: condenser fins clogged with mud, dust and leaves
The condenser sits at the front of the car and dumps heat out of the system. With Hong Kong’s dusty roads and cars parked under trees, the fins can become blocked with mud, leaves and insects, and heat rejection suffers. The signature is poor cooling at low speed in town, worst when you’re stationary at the lights, back to normal once you’re moving. A clean sorts it out with no parts needed, but deal with it early or the compressor ends up working harder than it should.
Cause 3: low refrigerant or a slow leak
Refrigerant circulates in a sealed system and in theory never “runs out”, but a slow leak at a joint, an O-ring or a component will gradually reduce the charge. The pattern is cold for the first few minutes, then progressively warmer, sometimes with an oily residue near the vents. Note that topping it up doesn’t fix it: without finding the leak it will be low again within months, and the refrigerant used in electric cars (R1234yf, for instance) needs approved equipment and recovery procedures — not a DIY job.
Cause 4: electric air-con compressor failure
Tesla’s compressor is a high-voltage electric unit, quite different from the belt-driven compressor on a petrol car. The failure signs are fairly clear: no cooling at all, ambient-temperature air from the vents, possibly a high-voltage system warning or an unusual noise. This is the genuine “compressor needs replacing” scenario — and the most expensive of the five. If the inspection does point to the compressor, see our AC compressor replacement service page for the process and what to expect; you may also find “Air-con not cold — do you really need a new compressor? 3 things to know before the repair” useful.
Cause 5: blend door actuator, temperature sensor or incorrect settings
The blend door actuator controls the mix of hot and cold air and the direction of flow. When it fails you get cold on one side and warm on the other, vents that won’t change direction, or a temperature that keeps swinging. Settings mistakes are even more common — auto fan speed left too low, the intake stuck on fresh air in traffic, or preconditioning never used, all leave you feeling “it isn’t cold”. These usually need a diagnostic read to pin down, and the repair cost is middling.
| Cause | Most common symptoms | What’s involved | Hong Kong reference cost |
|---|---|---|---|
| Blocked cabin filter | Weak airflow, musty smell, rarely a total loss of cooling | Replace the filter (an anti-bacterial clean can be done at the same time) | HK$350–1,200 |
| Condenser fins clogged | Poor cooling at low speed or when stationary, normal at speed | Clean the condenser fins, check the cooling fan | HK$400–900 |
| Low refrigerant / slow leak | Cold at first, gradually warmer; possible oily residue | Electronic leak detection, repair the leak, recharge to specification | HK$600–1,500 upwards (depending on the leak) |
| Electric compressor failure | No cooling at all, high-voltage warning, unusual noise | Replace the compressor once diagnosis confirms it | HK$5,000–15,000 (depending on model and parts source) |
| Blend door actuator / sensor / settings | Cold on one side only, vents stuck, temperature fluctuating | Fault-code diagnosis, replace the actuator or recalibrate | HK$800–2,500 |
The above are 2026 reference ranges for the Hong Kong market, for budgeting only; the actual cost depends on the condition of the car, the model, the parts chosen and labour time, and is always confirmed by the written quote after inspection.
5 self-check steps, and when to book it in immediately
Before you take the car to a workshop, five minutes and the five steps below will give you a head start. They’re no substitute for a professional inspection, but they help you describe the problem accurately — and stop anyone jumping straight to “it needs a new compressor”.
Step 1: compare airflow at the same fan setting
Set the fan to 3 and compare it with what you remember as normal. If it’s obviously weaker, the filter is the likely culprit eight times out of ten — and it’s the cheapest place to start.
Step 2: check the recirculation setting
Sitting in traffic on fresh air means drawing in the heat and exhaust of the car in front, so of course it won’t feel cold. Switch to recirculation for 2 to 3 minutes; if it cools straight away, the problem is more likely the air being drawn in than the air-conditioning itself.
Step 3: measure the vent temperature
Set the coldest temperature, maximum fan speed and recirculation, then use a thermometer or your hand at the vent. A healthy electric car air-conditioning system will typically deliver around 8 to 12°C or lower at the vent. If the air is merely “coolish” while airflow is normal, suspect the refrigerant or the compressor.
Step 4: precondition with the app, then get in
Switch the climate on from the Tesla app 10 to 15 minutes before you leave. If the car is comfortable when you get in but cools less and less as you drive, it’s usually heat rejection (the condenser) or the refrigerant; if preconditioning makes no difference at all, book an inspection straight away.
Step 5: watch for warning messages
Keep an eye on the display and the app for anything relating to the climate or high-voltage system. If a warning appears, don’t put it off — the air-conditioning and thermal management systems sit in the high-voltage category and aren’t a DIY strip-down.
These 3 situations mean book it in now — don’t wait
- Noise from the compressor: a screech or metallic grinding when the air-con is on; carrying on can turn a small fault into a large one;
- High-voltage system warning: this involves high-voltage components and needs a workshop with approved equipment;
- No cooling at all plus a burning smell in the cabin: stop using it and book an inspection immediately.
💡 Worth remembering: refrigerant checks, electronic leak detection and pressure gauge readings need proper equipment, and the “just top it up” approach carries real risk on an electric car — the wrong refrigerant, or a leak nobody found, can make matters worse. The right order is always: inspect first, quote second, start work once you approve.
How a professional inspection works: check → quote → go-ahead
Owners who haven’t been through it often worry: “Will they tell me a dozen things need replacing the moment I arrive?” A proper process looks like this, and you should expect any workshop to follow it:
Step 1: free inspection and diagnostic fault-code read
The technician reads the fault codes from the climate and thermal management systems, checks airflow and vent temperature, then pulls the filter out so you can see it for yourself. This step is free of charge, and you should ask to see the filter and the readings rather than just hear a conclusion.
Step 2: pressure gauge test and electronic leak detection
If refrigerant is suspected, gauges are connected to read the high and low side pressures, and an electronic leak detector is used to find the leak. A blocked condenser is assessed by looking directly at the fins. The whole diagnosis usually gives an answer within 30 to 60 minutes.
Step 3: an itemised written quote
The findings are then set out: which items need attention, how much the parts cost, how much labour is involved, and which items are “recommended” as opposed to “necessary”. You can have the filter changed and nothing else, or take the quote away and decide later — that’s your right.
Step 4: handover check before you take the car
Test it on the spot: airflow back to normal, cold air from the vents, no smell, no unusual noise. A reputable workshop will tell you which noises or smells should bring you straight back, rather than washing its hands of you at handover. To see exactly what an inspection covers, visit our Tesla repair service page, or contact us to book.
Price reference: filters, refrigerant and compressors at a glance
The question everyone asks: “What will it cost to sort the air-con out?” Honestly, it depends on the cause, the model and the brand of parts, so the figures below are reference ranges only — the written quote after inspection is what counts. Our principle is transparent pricing: every item listed separately, with no hidden charges.
| Item | Model 3 / Y reference range | Model S / X reference range | Notes |
|---|---|---|---|
| Cabin air filter replacement (parts + labour) | HK$350–900 | HK$500–1,200 | HEPA elements usually cost a little more |
| Condenser cleaning | HK$400–900 | HK$500–1,000 | Heavy blockage may mean removing some trim |
| Refrigerant check / recharge (with leak detection) | HK$600–1,500 | HK$700–1,800 | Any leak must be repaired first, charged separately |
| Blend door actuator / temperature sensor | HK$800–2,500 | HK$1,000–3,000 | Labour varies widely with location |
| Electric air-con compressor replacement | HK$5,000–12,000 | HK$6,000–15,000 | Depends on model, parts source and labour |
| Anti-bacterial climate system clean | HK$500–1,200 | HK$600–1,400 | For musty smells that persist after a filter change |
The above are 2026 reference ranges for the Hong Kong market, for budgeting only; the actual price depends on the condition of the car, the parts chosen and labour time, and is confirmed by the written quote after inspection.
Main dealer vs independent: which should you choose?
| What’s being compared | Main dealer / OEM service | Approved independent Tesla specialist |
|---|---|---|
| Price | Higher; labour rates are usually steeper | Typically 20%–40% less |
| Booking lead time | Long queues, especially in peak season | Often same-day or within a few days |
| Parts choice | Original equipment | OE or tier-one brand parts, with the source stated in the quote |
| Transparency | Standard process | You can watch the inspection, with readings explained on the spot |
| Warranty impact | No ambiguity | Consumable replacement generally has no effect; keep the receipt |
Our advice: confirm the cause before you choose the workshop. If it’s just a filter, it makes little difference where you go; but where a compressor or a refrigerant leak is involved, the technician’s diagnostic skill matters more than the price — get the diagnosis wrong and no replacement will fix it.
6 maintenance tips to keep the cold air flowing
- Replace the filter on schedule: in Hong Kong conditions, inspect every 12 to 18 months and change it as soon as there’s a smell or the airflow drops, rather than waiting for the official 2-year interval;
- Run the fan on high for the first 2 minutes of every drive: it clears residual moisture and odours and reduces mould build-up;
- Use the dry-out cycle after rain or damp spells: run the fan for a while after parking so the evaporator dries out — the cheapest anti-mould measure there is;
- Park in the shade or use a sunshade: it lowers the cabin’s heat load so the air-conditioning isn’t running flat out for the whole journey;
- Make the most of app preconditioning: cool the car 10 to 15 minutes before you leave so it’s cold when you get in, which also reduces energy use at the start of the drive;
- Check the condenser at the front regularly: if you park under trees, glance at the front intake now and then for leaves and debris.
For more on the relationship between air-conditioning and range, read our “Does the air-con drain the battery quickly?” guide to the common causes of range loss, and our summer driving guide to improving air-con performance and getting rid of odours. Filter parts can also be ordered through our parts sales service.
Frequently asked questions
Q1: How often should a Tesla cabin air filter be changed?
The official guidance is every 2 years for a standard activated carbon filter and every 3 years for a HEPA plus carbon filter. In Hong Kong’s humid, high-exhaust, street-parked conditions we’d shorten that to an inspection every 12 to 18 months, changing it as soon as there’s a musty smell or the airflow drops.
Q2: Can a blocked filter stop the air-con getting cold?
It will make you feel it isn’t cold, but it’s rarely the main cause. A clogged filter mainly affects airflow and heat exchange, so the symptoms are weak airflow and a smell rather than a total absence of cold air. If the airflow is normal but the temperature isn’t, suspect the refrigerant, the condenser or the compressor.
Q3: There’s a musty smell when I switch the air-con on — is a new filter enough?
In most cases a filter change clears the bulk of the smell. But if the evaporator itself has mould on it — common in cars that have gone years without a filter change — an anti-bacterial climate system clean is needed to sort it properly. Smells tend to be worst after a damp spell.
Q4: Is changing the filter myself difficult?
It depends on the model. Some need the glovebox or the side trim of the centre console removed, and first-timers easily break a clip or fit the filter the wrong way round (there’s an intake face). If you’d rather not risk it, a technician will usually have it done in a few tens of minutes, and parts and labour together still come to only a few hundred dollars.
Q5: If the air-con isn’t cold, do I have to replace the compressor?
No. The compressor is the most expensive of the five common causes, and not the most common one either. The right approach is to read the fault codes and test with pressure gauges first, ruling out the filter, condenser and refrigerant before deciding whether the compressor needs replacing. There should be clear evidence before anything is changed.
Q6: How is recharging an electric car’s refrigerant different from a petrol car?
Mainly the refrigerant specification and the system pressures — electric cars such as Teslas commonly use R1234yf, which needs approved equipment, recovery procedures and pressure gauge monitoring. Most importantly, find the leak first: topping up without repairing the leak just means the same problem in a few months.
Q7: What’s the quickest way to cool the car after it’s been in the sun?
Three things: precondition with the app 10 to 15 minutes before you leave; open the windows to let the hot air out before switching the air-con on; and use a high fan speed to bring the temperature down before settling back to a lower setting. It’s more comfortable, and it’s gentler on the climate system and the battery.
Q8: Does using the air-con a lot affect the 12V battery?
The compressor draws its power from the high-voltage battery, but the electronics that control the blend doors, sensors and displays run off the low-voltage battery. Owners with an ageing 12V battery sometimes see climate settings behaving oddly or warnings flickering up. For the warning signs of a failing 12V battery, see our battery replacement service page.
Q9: Which matters more, the cabin filter or window tint?
They solve different problems: the filter affects airflow and air quality, while tint affects the cabin’s heat load (how fast it heats up in the sun). For air-con that cools quickly and holds its temperature, both are worth doing; if the budget is tight, do the filter first, because it’s a consumable and it has a health impact.
Q10: How long does a compressor replacement take, and does it affect the warranty?
Depending on the model and layout, anywhere from a few hours to most of a day, since it involves draining the thermal management system, evacuating and recharging. The air-conditioning system is a wear item, so a normal replacement generally doesn’t affect the new-car warranty, but keep the repair invoice and proof of the parts source. Before using an independent workshop, check that it has the right diagnostic equipment.
Air-con not cold, or smelly vents? Let us take a look
HK Tesla Repair works exclusively on Teslas and offers a free air-conditioning inspection: we pull the filter out and show you, read the fault codes, test with pressure gauges and measure the vent temperature. When the inspection is done you get a quote on the spot, and work starts only once you approve — no pressure, no hidden charges, and nobody telling you to replace the compressor before the car has been looked at. If you decide not to go ahead, you pay nothing.
- ❄️ AC compressor replacement — diagnosis, replacement and refrigerant recharge in one place
- 🔧 Tesla repair services — from air-conditioning to batteries and bodywork
- 📦 Parts sales — original and quality aftermarket filters supplied
- 📞 Contact us — WhatsApp booking and instant quotes
Remember: inspect first, quote second, start work only once you approve — understand the cause, and you won’t waste money.
Last updated: 27 October 2026 | Prices shown are reference ranges; the final figure is confirmed in the written quote after inspection.